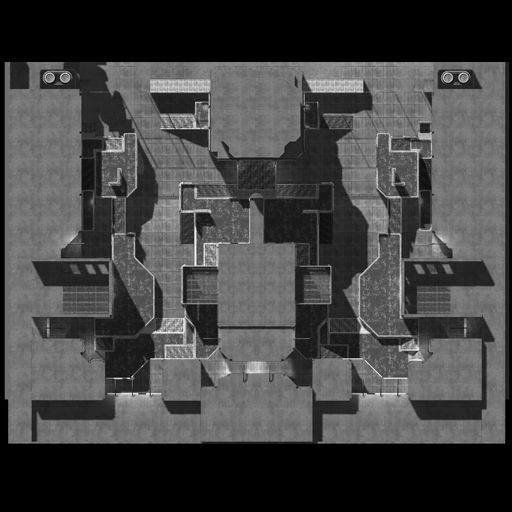
Using Sounds for Player Feedback

Introduction:

I have been working on creating sounds for Space Dunk recently, when designing sound for a game you have to make sounds for every interaction the player will encounter. Sounds are one of the ways that players receive feedback from the game, and good feedback can be the difference between a average game and an amazing game. Feedback does not only have to be visual, sounds can also be used to provide the player with feedback as long as you don’t throw too many sounds at the player at once.

Examples of Excellent Sound Feedback:

There have been several games with great sound design recently one of the best examples is Alien Isolation. This horror game uses sound to help raise the tension of being chased through a spaceship by an alien. The game relies on the sound to help set the mood of being hunted without the game having to show you the monster. The Halo series is another example of games with phenomenal sound design. The weapons that the enemies use against you all have very unique sounds so the player can tell what weapons the enemies are using without even seeing the enemies, this is also true for the enemy types the player can tell what enemies are around based on their dialog. When the player is in critical health a very subtle beeping sound warns the player that they can’t take much more damage, this sound is not too loud so that the player can hear all the other important sounds. This is one of the hardest parts of sound deign, making sure that the sounds don’t overpower each other. In any game there are certain sounds you want the player to hear every time however, you don’t want other feedback sounds to get drowned out. If a sound you are using to give the player feedback can’t be heard then the player is not getting the feedback they need.

Space Dunk Audio Feedback:

While working on the auditory feedback for Space Dunk I have been using QA testing to find out if any of my sounds are too loud or too soft. The first time I created a sound for the ball being thrown it was so quiet that if there was any other sound being played when a ball was thrown the players could not hear the throw sound. This is one of the first projects I have worked on where the sound wasn’t designed as an afterthought this has allowed me to get feedback on the sounds from QA and this has resulted in sounds that work together much better.

Deciding where to Spawn Players

Introduction:

When designing a multiplayer level one of the things that needs to be taken into consideration is where the players spawn. This is something that people think is simple however player spawns can make or break a level. If a player is constantly spawning too far away from the action they have to spend time getting to the action, if they are constantly respawning this can be very frustrating. On the other hand it can be just as frustrating to the player to spawn too close to the action, if they respawn too close to the action they have a chance to be killed right as they spawn which is (in my opinion) one of the most frustrating experiences in gaming.

Space Dunk Spawns:

When designing levels for Space Dunk the spawns constantly get moved, the players can’t die so respawning is restricted to after a team scores and the game resets. This poses its own set of problems, since the players respawn after a goal is scored so all the player have to respawn at the same time. When I was creating the half-court level I originally had the spawns on the opposite side of the map from the hoop. The problem with this method was the player would respawn and then immediately be able to grab the ball and easily make a shot. This turned the level into a race to see who can get the ball first and which ever team reached the ball first was almost guaranteed to score. After testing the map we decided to move the spawns to the same side as the hoop, this had the players initially running away from the hoop to get the ball then having to run back to the hoop to score.

Conclusion:

When deciding where to place the spawns remember that QA testing is the best way to find out if the spawn locations are good. The nice thing about spawn locations is that they are easy to move and test in different locations.

Leading Players Through a Level

Introduction:

One of the biggest challenges in level design is create an environment that is easy for the player to navigate. When creating a level you know what the layout is so it can be very easy to think that a level is easy to navigate but when it goes to testing players get lost easily. This not only shows the importance of QA testing it also presents the question: How does one lead a player through a level? There are several ways to give a player hints about where to go in a level without blatantly telling them such as: lighting, enemy placement, and items. Now lets explore each of these ways to lead the player through a level.

Lighting:

Lighting is important in any game, lighting can be used to generate a certain mood and it can be used to aid in player navigation. Horror games often use lighting to build mood and also lead player through an area. The eye is naturally drawn to lights and when a player is in a dark area they will move toward a lit area. A great example of this is in the Half-life 2 level Ravenholm. This area is a horror themed level where the player has to fight through a zombie infested town.

6063-106730-ravenholm02jpg-468x.jpg

Half-life 2 Ravenholm- The player first meets Father Grigori

The picture above shows the first time the player meets Father Grigori, a survivor who helps the player through the town. The player is drawn to this area due to the huge bright fire in front of the building. Above the fire there is a very bright light coming out of the open door where Father Grigori appears. This is intended to draw the players eye to where Grigori shows up, this is important because the level designer  uses this scene to teach the player that there are traps in the town that the player can use against the zombies.

Enemy Placement:

The placement of enemies can be used to guide players as well, however since the enemies are going to move towards the player this method does not always work. An amazing example of this being used well is also in Ravenholm. Immediately after the player meets Father Grigori (shown in the picture above) the player walks past a boarded up room.  As the player walks by two zombies start breaking through the boards and attacking the player. This draws the player to the room where the zombies just came from, and in that room the game teaches the player that they can turn on gas in certain areas to create fire. This is important later in the level, when the player has to turn off some gas to move on.

Items:

The placement of items in a level can help lead a player through an environment. A rule of thumb I use in games is that if I think I am getting turned around I start to scan the area of pick-ups, if an environment is picked clean I assume I have been there already. The Unreal Tournament series used very small heath pickups to show players different paths they can take through a level. Another example is in Bioshock, when the player acquires the shotgun. The weapon is placed in the middle of the room where the player can easily see it from the doorway. This causes the player to go into that room and get the weapon (although they are ambushed immediately after).

Conclusion:

There are many different ways to give the players hints on how to navigate the level or area. There are many ways that I didn’t get to discuss such as sound effects and environment clues. The biggest problem with levels that are not fun to play is that they are frustrating to navigate. A great level shows the player where to go without directly telling them, an amazing level subtly tells the player where to go without them realizing it.

Asymmetric Levels

Introduction:

Last week I talked about symmetric level design so this week I decided to look at the other side of the coin. Asymmetric levels offer unique design challenges, the biggest pit fall is having one side of the map be more desirable then the other. This can be a big issue in a team based game type, if one team spawns on a side with better weapons or power-ups the balancing will be off and one team will have a much easier time winning. If an asymmetric level is balanced well it can be a very interesting experience for the player, since each side of the map is different the players must come up with different strategies depending on where they spawn.

Asymmetric Maps:

tumblr_inline_mv8rdfywgg1somwzy.png

Escalation – Gears of War 1

The map Escalation from Gears of War is an excellent example of fantastic asymmetric level design. The map takes place on a large stair case one team spawns at the bottom and has to work their way up the stairs, the other team spawns at the top of the stairs and works their way down. This map may seem unbalanced but Epic Games used weapon spawns and the geometry of the level to keep things balanced. The team that starts at the top (the Estate Spawn in the picture above) has the advantage of being able to see the surrounding area better as well as superior firing positions. Since Gears of War is about taking cover during combat the players at the top of the map have positions that allow them to shoot down at the other team allowing them to get around the attacking teams cover. Their elevated position also makes it hard for the team coming up the stairs to hit the opposing team. The team that is advancing up the stairs (the team that starts at the Allfather Spawn) is given two sniper rifles to help even the odds. The team moving up the stairs has almost all the weapons spawn close to them, this helps them fight against an enemy with a superior position. The sparsity of weapons is very intentional, besides the sniper rifles there are only three other weapon pick-ups two of which are pistols and the last is some grenades. This makes the sniper rifles very powerful on this map since there aren’t any weapons to counter the snipers. Gears of War’s multiplayer works on a round system, when everyone on a team is killed the round ends and the teams trade spawns. This makes it so both teams have opportunities to take advantage of the high ground and the snipers respectively.

Conclusion: 

Asymmetric maps can live and die based on the balancing, its very compelling as a player to have two different sides that require different strategies to attack and defend. The biggest challenge that one must overcome when designing a asymmetric level is making sure one side is not more overpowered then the other, if one side is clearly at an advantage nobody is going to want to start on that side which can lead to players quitting early.

Symmetric Levels

Introduction:

There are many different types of levels in video games, two very popular types of multiplayer levels are Symmetric and Asymmetric. Both of these types of maps have advantages and disadvantages depending on what kind of experience you want your players to have. Symmetric maps are very common in team based objective game types (such as capture the flag) since neither side will have an advantage due to where they spawn. This post will explore symmetric maps and the ways they can be compelling.

Symmetric Maps:

ThePit-HeatMap.jpeg

Figure 1 Halo 3 – The Pit 

The Halo 3 map The Pit is one of my personal favorite symmetric maps of all time, This map is a great example of why symmetric maps are so compelling. This level was used for both deathmatch and objective game modes and was widely considered one of the best maps in Halo 3. The areas that both teams spawn in (represented below by the red and blue boxes) offer the players three major routes for player to get to the opposing teams base, there are more ways to get across the map however but the examples I am going to talk about are the most direct.

The Pit Spawns .jpg

Figure 2 The Pits Spawning Areas

The spawns offer more then just a base for the teams to start in, both teams have sniper rifles at the towers beside their spawns. This allows skilled players to quickly begin an offense play or a defense play. The areas in front of the sniper towers are very open however there are many safe ways to maneuver around snipers. Each side also has a shotgun that can be used to defend in the close quarters of the spawn area.

The Pit Common Routes.jpg

Figure 3 Routes

Figure 3 shows three of the many routes to get from one side of the map to the other. The purple path takes the player from the base past a sniper rifle, they then have two options: take the lower path witch is a long hallway with no cover or take the upper path which is a small square room. The hallway route is dangerous but also has a Overshield (a health power up), the hallway route is very quick and direct but it leaves the player exposed to a lot of enemy fire. The room route has very close quarters and also has an energy sword (one of the most powerful close quarters weapons in the game), this route offers more cover but it can be easily held down by one player with a close quarters weapon.  The Green path shows the routes that bring the player through the center of the map. The center of the map has a rocket launcher in the middle of a hallway, this area is easy for both sides to see and is often the area where the first kill of the game happens. The other hallway next to the rocket launcher has an invisibility power up which is very useful in objective game types. The blue route is the quickest way to get to the other side of the map but it requires the player to run at the other teams sniper tower this is very dangerous and there is not much cover available. This route has a few weapons but no super powerful ones, this route is more about speed then getting equipment. The thing that these routes all have in common is the center of the map has weapons and power ups that the players will fight over. The best symmetric maps (in my opinion) create reasons for the players to fight in the center of the map.


Creating Good Level Design Documents

Introduction:

When making levels for a game it is important to document your ideas, this way if your on a team everyone is on the same page and if your working by yourself you have something to work off of. A one page level design document can make the process of creating a level much easier. The methods that I am going to discuss have worked well for me but like anything in agile game development none of these rules are set in stone.

Level Drawing:

The first thing I like to do is make an illustration of the level this can be done in any program you prefer such as: Photoshop, Adobe Illustrator, or even Google Docs. If you have created a concept sketch digitizing that will make the process easier. It’s important to remember that if your level is 3D then you are making a 2D drawing to represent it, this can lead to confusion. In the cases where I have intricate 3D levels I like to have a top down drawing and a side drawing, this will help anyone else who sees the document understand the space. Once the drawing of the level is complete I like to draw arrows to the most important parts of the level and have boxes of text explaining any special mechanics that happen in those areas. If you document is for a single player level it is important to make a golden path. The golden path is the most ideal path a player can take to complete a level. Multiplayer levels do not have golden paths because where the player needs to go changes as the match progresses. The last thing you need once your drawing is complete is to make a key to show what certain symbols represent.

Asset List:

Another important thing you need to have in a level design document is a asset list, this is a list of every art and sound asset that the level will need to be completed. This is very helpful if you are working with artists and other designers. The list will also give you an idea about how long it will take to complete making the level.

Conclusion:

Level design documentation is very important if you are working on a team but it can also help you if your working by yourself. When making a level design document remember that no matter how good of a level idea you have it does not matter if your document is not readable.

Creating Level Concepts

This week I have been working on creating as many concepts as possible for potential arenas for the game Space Dunk. This process is one of my favorite aspects of game design because it allows me to flex my creative muscles and create a compelling environment for the player to explore. I wanted to use this blog post to give some insight into my process and hopefully help someone else who is stuck in the concept stage.

Starting Out:

When starting out a new level there are a lot of things to think about and this can get very overwhelming. The first thing I like to think about is: “What is this level teaching or emphasizing to the player” this gives me a jumping off point. When thinking about what the level is emphasizing to the player I don’t necessarily mean a set piece moment (although that can work too), but rather a primary game mechanic. One example of this in Space Dunk is a level concept I created that was made to emphasize passing the ball, passing is one of the primary mechanics in Space Dunk and by making a level centered around it I can help the players master this mechanic which will help them get better at the game. Once you have an idea about what you want your level to emphasize the next step is to begin sketching.

Drawing Your Level Concept:

I like to sketch out my ideas before I make a digital version, I find it easier to get all my ideas out. The most important thing I can tell you about drawing level design concepts is: do not be afraid to start over if an idea isn’t working out, that’s the beauty of sketching things out, its supposed to be quick and rough. However if you do end up starting over NEVER throw away your old design, even if you hate it. It always good to keep things around to inspire you later or just to remind yourself what NOT to do. It’s not important for the sketch to look nice, I am not very good at drawing but this step allows you to just put down as many ideas as possible as quickly as possible.

Conclusion:

The last step is to show it to your group members to get feedback before you continue forward. If your working by yourself show it to someone who plays games. I have always found it useful to get a second pair of eyes to look at something, sometimes they notice something obvious that you have overlooked. Once you are happy with your level concept it is time to move on to making a Level Design Document and then blocking out the level.

Space Dunk Initial Blog Post

This week I returned to Champlain College for my final semester, last semester I worked on a game that was cut and now I have joined a new team working on a game called Space Dunk. Space Dunk is a first person competitive multiplayer sports game that takes place in zero gravity arenas. The Space Dunk team asked me to join them to help them create more levels. During this first week we met and talked about what the teams goals for this semester are and what they wanted the new members to focus on. We discussed each of the mechanics that are already implemented and then talked about what mechanics we wanted to add this semester. I spent a lot of time this week doing research into different sports to help inspire my level design. The first thing I did was research real sports like Golf, Football, and Basketball, I wanted to know what made these games compelling. I honestly don’t watch sports but I have several friends that love professional sports and I talked extensively with them. I also looked at other sports games that are not realistic like: Rocket League, Unreal Tournament’s Bombing Run game mode, and Griff ball.

I started conceptualizing a bunch of different ideas I have, at this point in the development process I just wanted to create as many ideas as possible. I showed the list of all the level concepts to the team and had them tell me which ones they liked the best. Now that the list is narrowed down I am going to start sketching out a few different concepts and try to figure out what assets each level will need. The team is in constant communication at this point in the process and its really exciting to see the excitement that everyone has for this project.

Korku Postmortem

Where We Started:

When we started making Korku we wanted to make a multiplayer FPS game where the players could customize their mech’s load out. We quickly realized that with the time we had available this idea was over scoped. We eventually settled on a cooperative player vs AI game. We wanted each of the two players to feel important so we tried several different ways to divide up the tasks that each player had to do. The second player was given a UAV to scout the area and a buffing mechanic to power up different parts of the mech. The first player controlled the mech and fired the main weapons. We also decided to have our game set during World War 1.

Where We Ended:

When we presented the game to the faculty we had come a long way. We had improved the second player’s mechanics to streamline their game play and allow them to be more active in combat. We gave the second player heavy weapons to give them a role in combat and cut the UAV mechanic. The biggest change for the second player was changing the buffing mechanic from its original puzzle based game play to a resource management mechanic. Through QA testing we balanced the weapons and got the shooting to feel right. We ended up cutting the customization mechanic from our original idea since it required a lot of art assets and we only had one artist. Our final level had the player destroying a convoy and escaping the area.

What I Learned:

The biggest lesson I learned this semester was the importance of communicating with my artists during level design. I had worked on level design before but it was by myself, this was the first experience I have had working with another person on a level. When creating our games level I would send the changes I made to my artist and he would give me feedback. The entire team agreed that this helped improve the level a lot. I really liked having a second pair of eyes on the level to help me make it feel populated and interesting. This is going to be a very useful lesson next semester because I am doing level design again for a different team and I will be working with the same artist from my old team. I also learned about the dangers of making a game with networking. We had the two players in our game connect to each other using a online network, this ended up causing a lot of problems for us. We did not realize how difficult it was to get a network working without bugs. We had problems testing due to networking issues and we also had network problems during our presentation to the faculty. Another lesson I learned that will be helpful next semester is ways to cut down on the amount of memory a level uses. My artist showed me ways to conserve memory which will be helpful next semester when I am creating levels and want to optimize them so they work on lower end computers.

What Went Wrong:

There were only a few things that went wrong this semester. The biggest thing that went wrong was our networking issues. Our game required a working network to play and when we presented to the faculty we had issues that caused our game not to work during the first play session. We got it working by the final play session but the damage was done, not everybody got to play it and it was clear that the issues left a bad taste in peoples mouths. The other big mistake we made was over scoping, our initial idea was really ambitious and we quickly realized that we needed to scope down. Once we took out the player vs player aspect we did not want to take out much more, however the game was still over scoped and I feel that we were worried about scoping down any more even though we should have.

What Went Right:

There were a lot of things that went right while creating this game. I had an amazing team working with me, everyone was always communicating and the meetings had a friendly atmosphere. Nobody in the team was afraid to speak their mind and everyone took critiques very well. The strength of our team was the reason we wanted to make Korku, we had two other potential ideas for games to make but even though Korku was the most ambitious we all loved mech games and we knew our team could pull it off. Another thing that went right this semester was our QA sessions, we went to QA at least once a week and got great feedback about the game. There were several testers that were super excited about our game and we were happy with the responses.

Joining a New Team

The Senior Capstone class at my college (Champlain College) is set up so that after the first semester half the teams working on games are cut and added to other teams who are also working on their own games. My team was unfortunately cut however I was given an offer to work on a game called Space Dunk.  The team liked the level design work I did on Korku and wanted me to do level design work for them, I accepted their offer but it got me thinking about what its like to join a new team and work on another persons creative property. I would like to use this blog post to talk about the integration process to hopefully give people in the same situation some ideas about where to start .

Meeting the Team:

The first meeting we had as a new team was very helpful, we talked about what the original members of the team wanted the new members to focus on. I had the advantage of going to class with many of the members of my new team so learning everybody’s name was easy. I asked the team to see their design documentation so that I could familiarize myself with the game systems, if I want to design good levels I need to know how the game works inside and out. After everyone was acquainted we decided to hang out as a group to get to know each other better. We went to a bar and talked for a while, it was a very friendly environment and I really recommend doing something similar to this (although it does not have to be in a bar). By meeting everyone in a non work environment it was easy to get to know each other without the pressure associated with a formal environment. The meeting was a very helpful way to get acquainted with the team and I am super excited to work with them further.

Adding Members:

I have had experience with getting new members on a team that I have been working with. The last game I worked on was originally a team of five and grew into a team of ten. The biggest tip I can give to teams that are getting new members is to be open to changes they want to make. New members of a team are always worried about making too many changes and stepping on the original team members toes, however a new set of eyes on a project can open up doors the original team did not even think about. Even if you don’t like an idea show them that you are grateful that they are trying to help make the best game that can be made, if you make someone feel uncomfortable about speaking early on they may not bring up good ideas later in the project.  When I had new members join my team last year I was worried that my vision for the game would be changed but I was pleasantly surprised with the awesome ideas they contributed to the game.  Working on new teams can be a scary experience but it will help you grow as a designer and as a teammate.